My big push is on to erect the next stage of the playset, this stage should go reasonably fast as all the preparation has already been done. I’ve already installed the additional upright that the Monkey Bars will bolt on to, the only additional item is to drill the main corner upright for bolting the left upper rail of the Monkey Bars to the Jungle Fort.

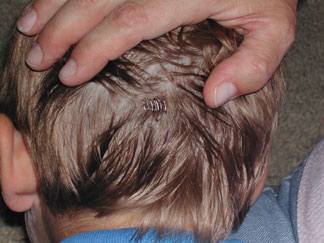
The length of the Monkey Bars from the Jungle Fort is eight feet with a height of just over seven feet. This gives a good workout for my son who just loves the Monkey Bars, even though as a three year old he had an accident that resulted in eight staple stitches being used to close up a gash in his head. This accident was the result of him trying to do the Monkey Bars at his pre-school group, he would persist in trying to get across to the other side and slipped, hitting his head on the step. Fortunately my wife was at hand to take him to the closest emergency medical center. This mishap had not phased him at all, in fact he’s more determined than ever, the very next week he was back on the bars.
The extent of the Monkey Bars kit was the tenoned dowel rods, carriage bolts, lag bolts and washers. The tenoned dowel rods would slot into the morticed holes that had been created with a spade bit in the lumber that had already been precut. I had marked all the holes in the positions as per the plans and setup the drill press with the 7/8 inch spade bit. To make the task easier I set the depth gauge on the drill press so that all the holes would be drilled at the same depth. I added a little additional clearance so as the dowels would not bed out before the shoulder hit the main body of the beam, this would ensure that the widths would be constant along the whole length. The same system was applied to the uprights that would hold the dowels for climbing up to the overhead bars.
To secure the upright beams to the overhead beams 5/8 inch holes plus counterbores were also drilled in place ready for the assembly. I had used the pre-pregnated lumber for this construction so I didn’t have to coat with the green preserve before coating with the redwood stain, this saved a day in time so I was able to start assembly on the Sunday.

Sunday turned out to be a beautiful day in Southern California so I made sure to setup as soon as I could to get the most benefit from the day. I had set my goals on completing the Monkey Bars this weekend and so far I had made a good dent in the task of getting there. The redwood stain had completely dried over night so I started off by inserting the dowel rods that would make up the ladder frame for the overhead portion of the Monkey Bars. The counterbores had been made deep enough so that the shoulders would hit firm on the main rails which always makes life easier. I didn’t want to have to redrill for the sake of a couple of millimeters so it was wise to go a little bit deeper.
The 7/8 inch counterbores were really tight for the dowel rods so the use of a mallet with a scrape piece of wood on top helped to drive the rung home. Everyone of the rungs where fixed into position this way and placed as close to square as possible, the task of aligning the top rail into position with these six rungs in place and having to position all six required more than a couple of hands. I also found that with the second rail on top of the dowels it would require something more substantial than a mallet to drive the dowels into position. With this I had to enlist the help of my son. His job was to help position all the dowel rods so that they could be tapped in with a ten pound hammer. Once they were started, systematic tapping along the length of the beam over the dowel rods drove them to their full depth. With this ladder frame now assembled I could secure each dowel with a deck screw to prevent any turning of the dowel while in use. For this I used my steady three drill combo, this is a real time saver and also saves my sanity from the constant drill, countersink and screw bit attachment changes that I had before.

With the top section of the Monkey Bars complete I set it aside making sure the direction was correct for installing to the Jungle Fort. The rungs were not completely symetrical from each end so it was important to have the first rung closest to the Jungle Fort at the fifteen inch spacing. The first rung by the ladder section of the Monkey Bars was set at eleven inches from the end.
The ladder section of the Monkey Bars consisted of four dowels of 23 inches in length. When assembled the upper section would sit inside the uprights and carriage bolt through. I used the same method of construction by fixing the four dowels in one side first then tapping the second into place then securing the dowels with deck screws. This section would have an additional base plate to sit on which was simply attached by deck screws.
With the basis of the ladder assembled, the first set of bolts would be to loosely attach the ladder section to the overhead section. I had to make sure to tighten the bolts enough so that the assembly would not rotate on itself, I had to hoist the stucture up and secure it to the Jungle Fort, I didn’t want the framework to fold in on itself as I lifted. The frame work was positioned close enough to the Jungle Fort in an “A” position, the object was to lift the end that would attach to the Jungle Fort so that it would be possible to slide at least one of the 1/2 inch by 7 inch carriage bolts into the upright of the Jungle Fort.
With the first carriage bolt pushed into position from the outside of the upright on the Jungle Fort I could then add the washer, spring washer and nut to the bolt eliminating any possibility of the structure collapsing onto my head. The second carriage bolt proved to be a little more difficult, this had to be inserted from the inside against the fence that was the safety barrier for the decking. The bolt hole position happens to be partially blocked by the vertical slats and with the size of the carriage bolt head it would start to bind up with the last slat before fully being pushed in. This left no alternative but to hammer the bolt into place marring up the surface of the slat on its way in. I was a little disappointed but I couldn’t see any other way to resolve the issue. I would have to remove the slats to insert the bolt then replace the slats, that would be the only alternative.
Now with it loosely secured, the framework was adjusted to a horizontal position checking with a spirit level both length wise and across the top of the frame. I found that the ground was slooping away towards the drainage hole which meant an additional piece of preserved timber would be placed underneath the base plate of the ladder section on that one end. The ladder section then being checked for vertical, again with a spirit level.

Once I was happy with the alignment, the bolts were tightened to prevent any movement. This left me with installing the brace work to the upper section between the cross ladder and the vertical ladder.
To double check the horizontal and vertical alignment I further checked with a large framing square, this would allow me then to adjust the angles on the brace pieces that would be lag bolted to the two sections. Fixing the brace required one lag bolt each end with no specific position for each. I just made sure to allow enough material around each lag bolt to avoid any split out of the material.
Once the lag bolts had been tightened the structure became very rigid. The final structural pieces to put in place were the two side braces securing the ladder section.

These side braces would eliminate any sideward sway, again I would check the structure with my framing square. The base plate that had been placed at the bottom of the ladder section had a slight curl that could be corrected with downward pressure. I decided to place the brace in position, pushing down so that the pre-cut angles would fit the base and the vertical face of the ladder section. While holding this in position I was able to toenail a deck screw top and bottom to hold the brace into place. The lag bolt positions for the brace were best to drill in situ, simply because I could direct the drill so that it gave the best bolting solution.
I first counterbored each position to the depth of the lag bolt head so that there would be zero sharp edges protruding, next was a simple drilling with a 1/4 inch spade bit in each position to provide the pilot hole for the 5 inch by 3/8 inch lag bolts.

Once the lag bolts had been ratcheted to the full depth, the Monkey Bars became totally rigid with no play in any direction. A simple end cap was placed on the ends of the upper rails at the ladder end just to tie the two sections together, I’m sure it’s a safety precaution just incase the screws holding the rungs in on the top should fail or it’s just an aesthetic piece. Either way this piece was held on with 2 1/2 inch by 3/8 inch lag bolts, a substantial fixing for a piece of eye candy so I think it’s for part of the structural integrity of the frame.

To complete the set up for the Monkey Bars a couple of grab handles were installed to help in entering the Jungle Fort.

With this section of the construction complete the next stage is to install the picnic table before the rock wall which are the last two major sections to our swing set. Little did I know on how long this project would take but looking at it now it has certainly been fun and something I would do again. Right now I better get geared up to install the picnic table!